Craving restaurant-quality dessert without the fuss? This Perfect Chocolate Mountain Lava Cake in 27 Min is your golden ticket to chocolate heaven!
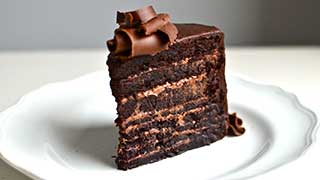
Imagine cutting into a decadent individual cake and watching warm, gooey chocolate lava flow out like edible magic—it’s basically a chocolate lover’s therapy session.
Perfect for date nights, dinner parties, or those “I need chocolate NOW” emergencies, this foolproof recipe delivers intensely rich, molten-centered perfection every single time.
You’ll use dark chocolate, butter, and a clever baking technique that sounds fancy but is surprisingly beginner-friendly. The secret? High heat and precise timing create that signature firm outer shell with an oozy center.
Whether you’re impressing guests or treating yourself, these individual lava cakes prove you don’t need culinary school to create show-stopping desserts. Best part? You probably have everything in your pantry right now!
How Long Will It Take to Prepare?
Prep Time: 15 minutes
Cooking Time: 12 minutes
Total Time: 27 minutes
Servings: 4 individual cakes
Difficulty: Easy to Medium
Flavor Profile: Rich, decadent, intensely chocolatey with a gooey molten center
Perfect For: Date nights, dinner parties, impressing guests, chocolate emergencies, celebratory moments
What is Chocolate Mountain Lava Cake?
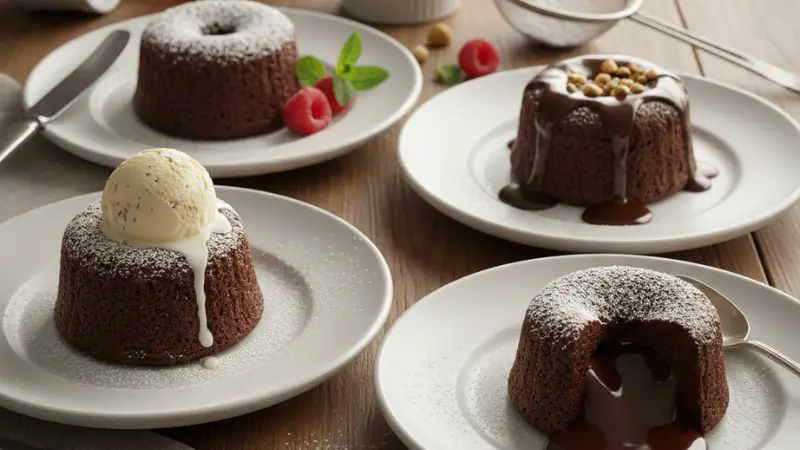
Chocolate mountain lava cake is a decadent individual dessert with a firm outer shell and a warm, gooey, molten chocolate center that flows out when you cut into it. You bake these mini cakes just long enough to set the edges while keeping the center gloriously liquid—it’s like edible chocolate magic!

Why You’ll Love This
Restaurant-quality dessert you can make at home in under 30 minutes.
Costs a fraction of what you’d pay at a fancy restaurant
Foolproof technique that looks incredibly impressive but is surprisingly simple
Intensely chocolatey with that perfect contrast between cake and flowing center
Make-ahead friendly—you can prep the batter and refrigerate until ready to bake.
Individual portions mean no slicing, no sharing disputes, everyone gets their own!
Essential Ingredients for Chocolate Mountain Lava Cake
For the Cakes:
- 113g (½ cup) unsalted butter, plus extra for greasing
- 115g (4 oz) dark chocolate (60-70% cocoa), chopped
- 100g (½ cup) granulated sugar
- 2 large eggs
- 2 large egg yolks
- 1 teaspoon vanilla extract
- Pinch of salt
- 30g (¼ cup) all-purpose flour
- 2 tablespoons unsweetened cocoa powder, for dusting ramekins
For Serving (Optional):
- Vanilla ice cream
- Fresh raspberries or strawberries
- Powdered sugar for dusting
- Whipped cream
- Mint leaves for garnish
Important Kitchen Essentials
You’ll need these tools to nail your lava cakes:
4 ramekins (6 oz or 175ml each) – The classic size for perfect individual cakes
Medium saucepan – For melting your chocolate and butter
Whisk and rubber spatula – For mixing without overmixing
Pastry brush – To butter those ramekins thoroughly
Kitchen timer – Timing is everything for that molten center
Oven mitts – Those ramekins get seriously hot
Small plates or dessert dishes – For your grand presentation
Instructions for Chocolate Mountain Lava Cake
Step 1: Prep Your Ramekins
Preheat your oven to 425°F (220°C)—yes, that’s hot, and it’s precisely what you need! Generously butter the inside of four 6-oz ramekins, making sure you get every corner and crevice.
Dust each ramekin with cocoa powder, tapping out the excess. This creates a non-stick coating and adds extra chocolate flavor. Place the prepared ramekins on a baking sheet (this makes them easier to move around).
Step 2: Melt the Chocolate and Butter
In a medium saucepan over low heat, combine 113g butter and 115g chopped dark chocolate. Stir gently until completely melted and smooth—this should take about 3-4 minutes. Don’t rush this! Remove from the heat and let it cool slightly while you prep the other ingredients. You want it warm, not hot, so it doesn’t scramble your eggs.
Step 3: Whisk the Sugar and Eggs
In a medium bowl, whisk together 100g sugar, 2 whole eggs, and 2 egg yolks until the mixture becomes thick and pale yellow (about 2 minutes of vigorous whisking).
You’re incorporating air here, which helps create that delicate outer cake texture. Add 1 teaspoon vanilla extract and a pinch of salt, whisking to combine.
Step 4: Combine Wet and Dry Ingredients
Pour your slightly cooled chocolate mixture into the egg mixture, whisking constantly as you pour. This tempers the eggs and prevents them from cooking.
Once combined, sift 30g flour over the top and gently fold it in with a rubber spatula. Use broad, sweeping motions and stop as soon as you don’t see any more flour streaks—overmixing develops gluten and makes the cakes challenging.
Step 5: Fill and Bake
Divide the batter evenly among your prepared ramekins, filling each about ¾ full. Give each ramekin a gentle tap on the counter to release any air bubbles.
Bake for 12-14 minutes until the edges are set and look cake-like, but the center still jiggles slightly when you gently shake the pan. The tops should look slightly cracked and firm. Don’t overbake! You want that lava center.
Step 6: The Grand Finale
Remove from the oven and let them rest for 1 minute—this allows the structure to set just enough for unmolding. Run a thin knife around the edge of each cake.
Place a dessert plate upside down over each ramekin, then carefully flip them over. Let them sit for 10 seconds, then gently lift the ramekin away. If it sticks, give it a gentle shake. Dust with powdered sugar, add your toppings, and serve immediately!
Additional Tips for Chocolate Mountain Lava Cake
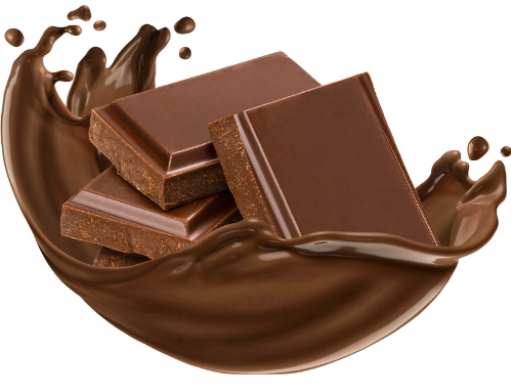
Use quality chocolate! Since chocolate is the star, choose a brand you’d actually enjoy eating plain. The better the chocolate, the better your cakes.
Make-ahead magic: You can fill the ramekins and refrigerate them for up to 24 hours before baking. Just add 2-3 extra minutes to the baking time since they’re starting cold.
Every oven is different. Start checking at 11 minutes. You want the edges firm but the center looking slightly underdone—that’s where the magic happens!
Frozen center trick: Some bakers freeze a small piece of chocolate ganache and place it in the center of each ramekin before adding batter. This guarantees a molten center even if you slightly overbake.
Temperature matters: If your batter seems too thin, pop it in the fridge for 10 minutes to thicken up before baking.
The smell test: When your kitchen smells intensely chocolatey, and the edges have pulled away slightly from the ramekins, they’re probably done!
Variations of Chocolate Mountain Lava Cake
1. White Chocolate Raspberry Lava Cake
Swap dark chocolate for 115g white chocolate and add ¼ cup fresh or frozen raspberries to the batter before baking. The tartness of raspberries balances the sweetness beautifully. Top with more fresh raspberries and white chocolate shavings.
2. Salted Caramel Lava Cake
Add 2 tablespoons caramel sauce to the center of each ramekin before baking, and sprinkle the tops with flaky sea salt right before serving. The sweet-salty combination is absolutely addictive!
3. Peanut Butter Lava Cake
Swirl 1 tablespoon creamy peanut butter into each ramekin before baking. You can also add 2 tablespoons of peanut butter chips to the batter. Top with chopped peanuts for extra crunch. It’s like a liquid Reese’s cup!
4. Mint Chocolate Lava Cake
Replace vanilla extract with ½ teaspoon peppermint extract (go easy—peppermint is strong!). You can also add 2 tablespoons of mini chocolate chips and a few drops of green food coloring for a festive touch. Perfect for holidays!
5. Espresso Chocolate Lava Cake
Add 1 tablespoon instant espresso powder to your melted chocolate mixture. The coffee enhances the chocolate flavor and adds sophisticated depth. Top with chocolate-covered espresso beans.
6. Orange Chocolate Lava Cake
Add 1 teaspoon orange zest and ½ teaspoon orange extract to your batter. The citrus cuts through the richness perfectly. Serve with candied orange peel on top.
Precautions for Chocolate Mountain Lava Cake
- Timing is critical! Overbaking by even 2 minutes can turn your lava cake into a regular (albeit delicious) chocolate cake. Set that timer and watch closely.
- Those ramekins are HOT! Use oven mitts and be careful when flipping. Warn your guests before they dive in—that molten center can burn tongues!
- Butter thoroughly. If you skip corners when greasing your ramekins, your cakes will stick and break when you try to unmold them. Get in there with that pastry brush!
- Use room temperature eggs if possible. They incorporate more smoothly into the chocolate mixture, resulting in a better texture.
- Don’t use chocolate chips for melting—they contain stabilizers that prevent smooth melting. Use bar chocolate, chopped into small pieces.
- Serve immediately! These cakes wait for no one. The molten center starts to set as they cool, so get them to the table quickly.
- Oven temperature accuracy matters. If your oven runs hot or cool, invest in an oven thermometer. A difference of 25°F can ruin your lava effect.
Nutrition Facts (Per Serving)
| Nutrient | Amount |
| Calories | 420 kcal |
| Total Fat | 28g |
| Saturated Fat | 17g |
| Cholesterol | 215mg |
| Sodium | 85mg |
| Total Carbohydrates | 38g |
| Dietary Fiber | 2g |
| Sugars | 28g |
| Protein | 7g |
| Calcium | 45mg |
| Iron | 3mg |
Note: Nutrition facts are estimates based on standard ingredients and may vary based on specific brands and modifications.
The Science Behind the Lava
Here’s what makes these cakes work: You’re essentially underbaking the center on purpose! The high oven temperature (425°F) quickly sets the outer edges, while the center stays liquid.
The ratio of eggs to flour is also key—more eggs mean more liquid, while minimal flour means less structure. When you pull them out at just the right moment (when the edges are firm but the center jiggles), you’ve created that perfect molten core.
The resting time allows the outer structure to firm up just enough to hold its shape when flipped, while keeping that chocolatey lava flowing!
Serving Suggestions
- Classic combo: Serve with a scoop of vanilla ice cream that melts into the warm lava—temperature contrast is everything!
- Fresh fruit: Add raspberries, strawberries, or cherries for a tart counterpoint to all that chocolate richness.
- Beverage pairings: These pair beautifully with coffee, dessert wine, or even a cold glass of milk if you’re feeling nostalgic.
- Presentation matters: Dust with powdered sugar, add a mint sprig, or drizzle the plate with raspberry coulis for restaurant-quality plating.
Conclusion
You’ve just mastered one of the most impressive desserts in the home baker’s arsenal! Chocolate mountain lava cake proves that restaurant-quality doesn’t have to mean restaurant-complicated.
With just 15 minutes of prep and the right timing, you’re serving up individual portions of pure chocolate bliss. The best part?
That moment when your fork breaks through the outer cake and warm chocolate lava flows out—it never gets old, and your guests will think you’re a culinary genius.
Whether it’s a Tuesday night treat or a special celebration, these little cakes deliver big-time satisfaction. Now go forth and let that chocolate flow!
Frequently Asked Questions
Can I make these without ramekins?
Yes! You can use a muffin tin, but reduce the baking time to 8-10 minutes since the cakes will be more miniature. You can also use 4-oz custard cups or even oven-safe coffee mugs in a pinch. Just make sure whatever you use is well-buttered and cocoa-dusted.
Why didn’t my lava cake have a molten center?
This usually means you overbaked them. Every oven is different, so start checking at 11 minutes. The center should jiggle slightly when you gently shake the pan. Remember, it’s better to underbake slightly than overbake—you can always pop an underdone cake back in the oven for a minute!
Can I freeze these for later?
Absolutely! Fill your prepared ramekins with batter, cover tightly with plastic wrap, and freeze for up to 3 months. Bake directly from frozen, adding 3-5 extra minutes to the baking time. No thawing needed! This is perfect for having an emergency dessert ready to go.
What’s the best chocolate to use?
Choose a good-quality dark chocolate with 60-70% cocoa content. Brands like Ghirardelli, Lindt, or Valrhona work beautifully. Avoid chocolate chips since they contain stabilizers that prevent smooth melting. The chocolate flavor is front and center here, so use something you’d enjoy eating on its own!
How do I know when they’re perfectly done?
Look for these signs: edges are set and pulling away slightly from the ramekin, the top has a thin crust and might have small cracks, and the center still jiggles like Jell-O when you gently shake the pan. When you gently press the top, it should spring back around the edges, but the center should feel soft. That’s your signal!