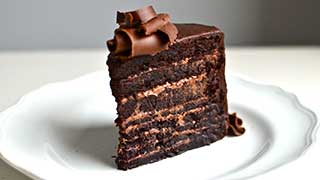
No oven? No problem, this easy chocolate cake recipe without an oven can be baked at home, a godsend for hostel-dwellers and those whose ovens have suddenly “retired”. Steamed to perfection, each piece is incredibly soft, fudgy, and seriously chocolatey. Ready in under 45 minutes using just a stovetop pot, it’s beginner-friendly magic your microwave wishes it could pull off.

Trust me — one bite, and you’ll never miss the oven again.
Table of Contents
How Long Will It Take to Prepare?
- Prep Time: 15 minutes
- Cooking Time: 0 minutes (No oven needed!)
- Chilling Time: 2–3 hours
- Total Time: 2 hours 15 minutes
- Servings: 8 slices
- Difficulty: Easy (beginner-friendly!)
- Flavor Profile: Rich, creamy, intensely chocolatey
- Perfect For: Birthday celebrations, last-minute desserts, hot summer days, kitchen beginners, oven-free cooking
What is an Easy Chocolate Cake Recipe Without an Oven?
An easy chocolate cake recipe without an oven is a no-bake dessert that uses refrigeration rather than heat to set the cake. You’ll layer chocolate biscuits or cookies with a luscious chocolate cream mixture, then chill until firm. The result?
A decadent, sliceable cake that tastes like you spent hours baking—but you didn’t even turn on the oven!
This method is perfect when your oven is broken, the weather’s too hot, or you want chocolate cake right now without the fuss.
Why You’ll Love This Easy Chocolate Cake Recipe Without an Oven
- Zero Baking Skills Required – If you can stir and spread, you can make this cake: no mixers, no temperature precision, no stress.
- Ready Ridiculously Fast – Active work takes just 15 minutes. The fridge does the heavy lifting while you binge your favorite show.
- Intensely Chocolatey – This isn’t shy about chocolate. It’s rich, creamy, and satisfies every cocoa craving you’ve ever had.
- Stays Cool in Hot Weather – Summer heatwave? No problem. This cake actually prefers the cold and won’t melt on your countertop.
- Budget-Friendly Ingredients – No fancy equipment or expensive items. Just pantry staples and a few indulgent extras.
- Kid-Friendly Assembly – Get the little ones involved! They’ll love crushing biscuits and spreading chocolate (and sneaking tastes).
Essential Ingredients for Easy Chocolate Cake Without Oven
For the Base:
- 300g chocolate biscuits (like digestive biscuits, graham crackers, or Marie biscuits—whatever you have!)
- 80g melted butter (that’s about 1/3 cup)
For the Chocolate Cream Layer:
- 400ml heavy whipping cream (1 2/3 cups—chilled for best results)
- 200g dark chocolate (about 1 1/3 cups chocolate chips or chopped bars, 50–70% cocoa)
- 3 tablespoons cocoa powder (unsweetened)
- 1/2 cup powdered sugar (60g, adjust to your sweetness preference)
- 1 teaspoon vanilla extract (for that bakery smell)
- Pinch of salt (it makes chocolate taste more chocolatey—science!)
For Topping (Optional but Encouraged):
- Chocolate shavings or cocoa powder for dusting
- Fresh berries (strawberries or raspberries add a nice tang)
- Crushed nuts (almonds or hazelnuts for crunch)
Important Kitchen Essentials
You don’t need a fancy kitchen, but these tools will make your life easier:
- 8-inch square or Pannd pan (or any dish that fits in your fridge)
- Mixing bowls (one large, one medium)
- Spatula or wooden spoon (for stirring and spreading)
- Microwave or double boiler (to melt chocolate gently—don’t burn it!)
Measuring cups and spoons (precision = perfection) - Plastic wrap or parchment paper (to line the pan for easy removal)
- Refrigerator space (this cake needs a chill session)
Pro Tip: Line a pan with parchment paper, with the edges hanging over the edges. When the cake’s set, you’ll lift it out like a boss—no knife scraping required!
Instructions for Easy Chocolate Cake Without Oven
Step 1: Prepare Your Pan
Line your 8-inch pan with parchment paper, letting the edges hang over the sides. This is your ejection seat for the finished cake—you’ll thank yourself later.
Step 2: Make the Biscuit Base
Crush 300g chocolate biscuits into fine crumbs. You can use a food processor (quick and satisfying) or smash them in a sealed bag with a rolling pin (great for releasing stress). Melt 80g butter and mix it into the crumbs until Everything looks like wet sand.
Press this mixture firmly into the bottom of the Panur pan. Firmly means it—pack it down like you’re building a sand castle. Pop it in the fridge while you make the filling.
Step 3: Melt the Chocolate
Chop 200g dark chocolate into small pieces (smaller = faster melting). Melt it in a double boiler (a heatproof bowl over simmering water) or in the microwave in 20-second bursts, stirring between each.
You want it smooth and glossy, not seized and grainy. Let it cool for 5 minutes—you don’t want to cook the cream in the next step.
Step 4: Whip the Cream
In a chilled bowl, beat 400ml heavy cream with an electric mixer (or by hand if you’re feeling athletic) until soft peaks form.
That means when you lift the whisk, the cream holds its shape, but the tip gently flops over—not stiff, not liquid. This takes about 3–4 minutes with a mixer.
Step 5: Combine Chocolate and Cream
Gently fold the cooled, melted chocolate into the whipped cream. Add 3 tablespoons cocoa powder, 1/2 cup powdered sugar, 1 teaspoon vanilla extract, and a pinch of salt. Fold gently—you want to keep the air in the cream. Use a spatula to make a swooping motion, as if you’re stirring the mixture. The result should be fluffy, mousse-like, and irresistibly chocolatey.
Step 6: Assemble the Cake
Pour the chocolate cream over your chilled biscuit base. Spread it evenly with a spatula, smoothing the top like you’re icing a cake (because you are!). TaPanhe pan gently on the counter a few times to release air bubbles.
Step 7: Chill Until Set
Cover with plastic wrap and refrigerate for 2–3 hours (or overnight if you’re planning). The cake is ready when it’s firm to the touch and slices cleanly.
That’s when the magic has happened—the biscuit has softened slightly, the cream has set, and Everything’s melded into cake perfection.
Step 8: Serve and Decorate
Lift the cake out using the parchment paper overhang. Dust with cocoa powder, add chocolate shavings, or top with fresh berries. Slice with a sharp knife (wipe it between cuts for clean edges) and watch everyone’s eyes light up.
Additional Tips for Easy Chocolate Cake Without Oven
- Use Quality Chocolate – The chocolate is the star here, so choose one you’d actually enjoy eating plain. Cheap chocolate can taste waxy when it’s the main flavor.
- Keep Everything Cold – Chill your mixing bowl and cream before whipping. Cold cream whips faster and holds its shape better.
- Don’t Rush the Chilling – Patience, friend! If you slice too early, the cake will be messy. Give it the full 2–3 hours to firm up properly.
- Room-temperature butter for the Base – if your butter’s too hot, it’ll make the biscuits soggy instead of crispy. Melted but not scalding is the sweet spot.
- Balance Sweetness with Fruit – If your chocolate’s very sweet, serve it with tart berries. They cut through the richness beautifully.
- Use a Hot Knife for Clean Slices – Dip your knife in hot water, wipe it dry, then slice. Repeat for each cut. You’ll get bakery-perfect edges.
- Storage Smarts – This cake keeps in the fridge for up to 5 days in an airtight container. It also freezes well for up to a month—thaw in the fridge before serving.
Variations for Easy Chocolate Cake Without an Oven
1. Oreo Chocolate Dream Cake
Swap the plain biscuits for crushed Oreos (cream and all). The Base will be extra dark and cookies-and-cream flavored. Add some crushed Oreos between layers for texture.
2. Peanut Butter Chocolate Fusion
Add 3 tablespoons peanut butter to the chocolate cream mixture. Swirl it through with a knife for a marbled effect. Top with chopped peanuts and a drizzle of melted peanut butter.
3. Mint Chocolate Chip Delight
Add 1/2 teaspoon peppermint extract to the cream layer and fold in 1/2 cup mini chocolate chips. It’s like a no-bake After Eight cake—refreshing and indulgent.
4. Coffee Chocolate Tiramisu Twist
Brush the biscuit base with 2 tablespoons of strong, freshly brewed coffee before adding the cream. Mix 1 tablespoon instant espresso powder into the chocolate layer. Dust with cocoa and you’ve got a no-bake tiramisu-meets-chocolate-cake hybrid.
5. White Chocolate Raspberry Version
Use white chocolate instead of dark, and fold in 1/2 cup fresh or frozen raspberries (gently, so they don’t bleed too much). Top with more berries for a beautiful pink-and-white finish.
6. Nutella Lover’s Cake
Replace half the melted chocolate with 100g Nutella. The hazelnut flavor takes this to another level. Garnish with toasted hazelnuts.
Precautions for Easy Chocolate Cake Without an Oven
Don’t Overheat the Chocolate – Chocolate burns easily. Use low heat or short microwave bursts. If it seizes (becomes grainy and clumpy), it’s ruined—start over.
Don’t Overwhip the Cream – Stop at soft peaks. If you go too far, you’ll end up with butter instead of fluffy cream. Watch it closely!
EnsurPanhe Pan Fits in Your Fridge – Measure before you start. A pan that doesn’t fit = a very sad, un-chilled cake.
Avoid Wet Toppings Before Chilling – Fresh fruit releases moisture. Add berries or wet decorations after the cake has set, not before.
Check Expiry Dates on Cream – Fresh cream is essential. Old cream won’t whip properly and can taste sour.
Keep It Refrigerated Until Serving – This is a chilled dessert. Leave it out too long, and it’ll soften and lose structure—especially in warm weather.
Nutrition Facts (Per Slice, 8 Servings)
| Nutrient | Amount |
| Calories | 420 kcal |
| Total Fat | 32g |
| Saturated Fat | 20g |
| Carbohydrates | 34g |
| Sugars | 22g |
| Protein | 4g |
| Fiber | 2g |
| Sodium | 150mg |
| Cholesterol | 75mg |
Note: Nutritional values are approximate and may vary depending on specific brands and ingredient choices. This is a treat, not a salad—enjoy it guilt-free in moderation!
Conclusion
This easy chocolate cake recipe without an oven proves you don’t need fancy equipment or culinary school training to create dessert magic. With just a handful of ingredients, a little stirring, and some patience while the fridge does its thing, you’ll have a rich, creamy, absolutely delicious chocolate cake that’ll make everyone ask for seconds.
Whether you’re dodging a broken oven, beating the summer heat, or just craving chocolate right this second, this no-bake wonder has your back. It’s beginner-friendly, endlessly customizable, and seriously impressive—even though it’s secretly super easy.
So grab your biscuits, melt that chocolate, and get ready to become the dessert hero of your household. You’ve got this!
Frequently Asked Questions
Can I make this cake ahead of time?
Absolutely! In fact, this cake actually improves when made a day ahead. The biscuit layer softens slightly and melds with the chocolate cream, creating a more unified texture. You can make it up to 2 days in advance—keep it covered in the fridge. Add fresh toppings like berries or whipped cream right before serving to keep them looking fresh.
What can I use instead of heavy whipping cream?
If you can’t find heavy cream, try whipping cream (at least 30% fat content) or double cream. In a pinch, you can use full-fat coconut cream (the thick part from a chilled can) for a dairy-free version, though the flavor will have a subtle coconut note. Avoid using milk or half-and-half—they won’t whip up properly, and your cake will be runny instead of fluffy.
How do I know when the cake is fully set?
The cake is ready when the top feels firm to the touch, similar to a set cheesecake. If you gently press the center with your finger, it should spring back slightly rather than leaving an indent. When you slice it, the knife should cut cleanly without the filling oozing out. If it’s still jiggly or soft, give it another hour in the fridge—patience pays off with perfect slices!
Can I freeze this chocolate cake?
Yes, it freezes beautifully! Wrap individual slices or the whole cake tightly in plastic wrap, then aluminum foil. Freeze for up to 1 month. To serve, thaw in the refrigerator overnight (not at room temperature, which can make it soggy). The texture stays remarkably similar to fresh—some people even prefer it slightly frozen on hot days, like a chocolate ice cream cake!