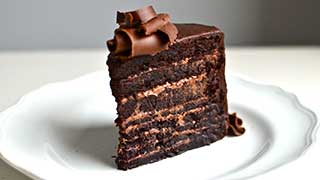

I’ve made a lot of chocolate cakes in my years behind a pastry bench, but this soft chocolate cake recipe is the one I keep coming back to when I need something reliable and genuinely delicious. It’s the cake my neighbors ask for by name, and the one I bake when I don’t have time to fuss but still want people to think I did.
What makes this recipe different is the crumb. It’s soft, almost velvety, without being dense or greasy, and it stays that way for days on the counter, not just the day you bake it. There’s no stand mixer required, no complicated technique, and no obscure ingredients.
Just one bowl, a whisk, and about fifteen minutes of hands-on work. If you’ve ever ended up with a dry, crumbly chocolate cake and wondered where you went wrong, this recipe fixes that problem for good.
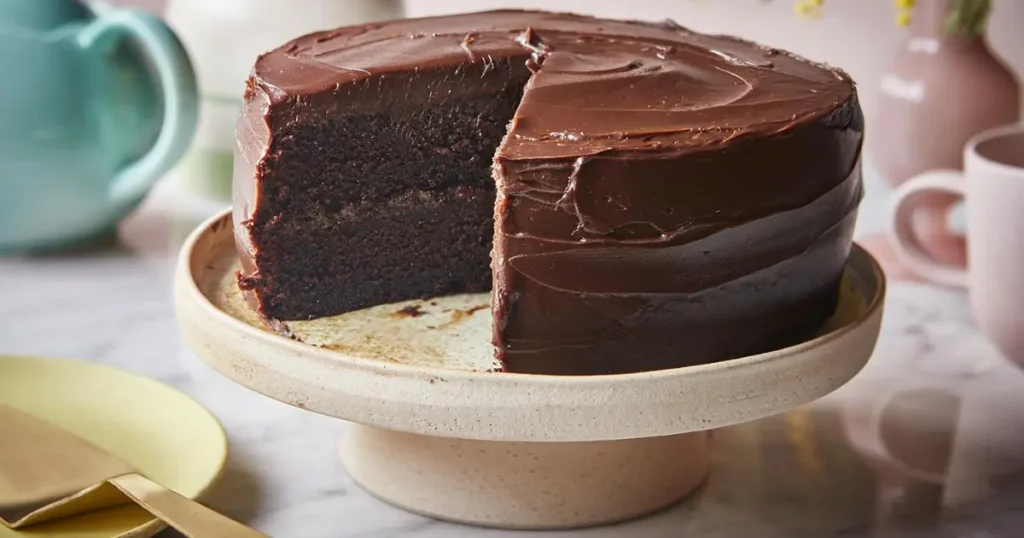
Let’s get into why this one works so well.
Why You’ll Love This Recipe
- Incredibly soft, moist crumb that doesn’t dry out the next day
- One-bowl method, no stand mixer or fancy equipment needed
- Made with simple pantry staples you probably already have
- Deep chocolate flavor without being overly sweet
- Beginner-friendly with clear, foolproof steps
- Freezes beautifully for make-ahead baking
- Easily adaptable into cupcakes, layers, or a sheet cake
- Consistent results every single time you bake it
Ingredients

For the cake:
- 1 3/4 cups (220g) all-purpose flour
- 3/4 cup (65g) unsweetened cocoa powder
- 1 1/2 teaspoons baking soda
- 1/2 teaspoon baking powder
- 1 teaspoon fine salt
- 2 cups (400g) granulated sugar
- 2 large eggs, room temperature
- 1 cup (240ml) buttermilk, room temperature
- 1/2 cup (120ml) vegetable oil or neutral oil
- 2 teaspoons pure vanilla extract
- 1 cup (240ml) hot coffee (or hot water)
For the chocolate glaze (optional but recommended):
- 4 oz (115g) semisweet chocolate, chopped
- 1/2 cup (120ml) heavy cream
- 1 tablespoon unsalted butter
Ingredient Notes
- Cocoa powder: Use natural unsweetened cocoa powder, not Dutch-processed, since the recipe relies on the acidity of natural cocoa to react with the baking soda for lift. Dutch-processed cocoa will still work in a pinch, but the cake will rise slightly less and taste a touch milder.
- Buttermilk: This is the real secret to the soft texture. If you don’t have buttermilk, stir 1 tablespoon of white vinegar or lemon juice into 1 cup of regular milk and let it sit for 5 minutes before using.
- Oil instead of butter: Oil stays liquid at room temperature, which is exactly why this cake stays soft even when chilled. Butter solidifies as it cools, which is part of why butter-based chocolate cakes can turn firm or dry a day later. You can substitute melted and cooled coconut oil for a subtle flavor twist.
- Hot coffee: Coffee doesn’t make the cake taste like coffee. It deepens and intensifies the chocolate flavor. If you’d rather skip it, hot water works fine, though the chocolate flavor will be a little less rich.
- Eggs: Room temperature eggs incorporate more evenly into the batter, which helps the cake bake up level and tender. If you forget to take them out ahead of time, set them in a bowl of warm water for about 5 minutes.
Kitchen Equipment Needed
- Two 9-inch round cake pans (or one 9×13-inch pan)
- Large mixing bowl
- Whisk
- Rubber spatula
- Measuring cups and spoons
- Wire cooling rack
- Parchment paper
Prep Time: 15 minutes
Cook Time: 30–35 minutes
Total Time: 50 minutes (plus cooling time)
Servings: 12 slices
Step-by-Step Instructions

- Preheat and prep your pans. Preheat your oven to 350°F (175°C). Grease two 9-inch round cake pans, line the bottoms with parchment paper, and dust the sides with a little cocoa powder instead of flour to avoid white streaks on the finished cake.
- Whisk the dry ingredients. In a large bowl, whisk together the flour, cocoa powder, baking soda, baking powder, and salt. Whisking the dry ingredients thoroughly before adding anything wet ensures the leavening is evenly distributed, so you don’t end up with a cake that rises unevenly or has bitter pockets of baking soda.
- Add the sugar. Whisk in the granulated sugar until it’s evenly combined with the dry mixture.
- Add the wet ingredients. Add the eggs, buttermilk, oil, and vanilla extract directly to the bowl. Whisk everything together until the batter is smooth, and no streaks of flour remain. The batter will be thick at this stage, and that’s expected.
- Stir in the hot coffee. Slowly pour in the hot coffee while whisking gently. The batter will turn noticeably thin, almost like chocolate milk. Don’t worry, this is exactly what gives the cake its soft, moist crumb. Avoid overmixing here; stir just until combined.
- Divide and bake. Pour the batter evenly between your prepared pans. Bake for 30 to 35 minutes, or until a toothpick inserted into the center comes out with a few moist crumbs, not wet batter.
- Cool completely before frosting. Let the cakes cool in the pans for 10 minutes, then turn them out onto a wire rack to cool completely. This step matters more than most people realize; frosting a warm cake causes the glaze or frosting to slide right off.
- Make the glaze. Heat the heavy cream in a small saucepan or in the microwave until it’s just simmering, not boiling. Pour it over the chopped chocolate and butter in a heatproof bowl. Let it sit for 2 minutes, then stir until completely smooth and glossy.
- Assemble and glaze. Place one cake layer on a serving plate, spread a thin layer of glaze on top, then stack the second layer on top. Pour the remaining glaze over the top, letting it drip down the sides naturally.
- Slice and serve. Let the glaze set for about 15 minutes before slicing for cleaner cuts.
Pro Tips
- Weigh your flour if you have a kitchen scale. Scooping flour directly with a measuring cup can pack in up to 20 percent more flour than intended, which is one of the most common causes of dry cake.
- Don’t overbake. This cake goes from perfectly moist to dry in just a few extra minutes, so start checking at the 28-minute mark.
- Let your eggs and buttermilk come to room temperature before mixing for a smoother batter and a more even rise.
- Use a serrated knife to level your cake layers if they domed slightly, so your finished cake stacks evenly.
Common Mistakes to Avoid
- Overmixing the batter develops the gluten in the flour, resulting in a tougher, more rubbery crumb instead of a soft one.
- Opening the oven door too early: This can cause the cake to sink in the middle before it’s fully set.
- Using cold ingredients: Cold eggs or buttermilk can cause the batter to look curdled and bake unevenly.
- Skipping the parchment paper: Even well-greased pans can cause sticking with a batter this moist; parchment is cheap insurance.
- Frosting a warm cake: This melts the glaze, leaving you with a messy, sliding topping instead of a clean finish.
Variations
- Chocolate Cupcakes: Divide the batter into a lined muffin tin and bake at 350°F for 18 to 20 minutes.
- Sheet Cake: Pour the full batter into a greased 9×13-inch pan and bake for 35 to 40 minutes.
- Espresso Chocolate Cake: Add 1 tablespoon of instant espresso powder to the dry ingredients for a deeper mocha note.
- Peanut Butter Chocolate Cake: Swirl 1/2 cup of warmed peanut butter into the batter before baking.
- Chocolate Cake with Cream Cheese Frosting: Swap the chocolate glaze for a classic cream cheese frosting for extra tang and richness.
- Gluten-Free Version: Substitute all-purpose flour with a 1:1 gluten-free baking blend containing xanthan gum.
- Orange Chocolate Cake: Add 1 tablespoon of orange zest to the batter for a bright, citrusy contrast to the cocoa.
Storage Instructions
Store the cake in an airtight container at room temperature for up to 3 days, or in the refrigerator for up to 5 days. If refrigerated, let slices sit at room temperature for about 20 minutes before serving, since the oil-based crumb softens back up nicely once it warms.
Freezing Instructions
This cake freezes exceptionally well thanks to the oil in the batter. Wrap unfrosted cake layers tightly in plastic wrap, then in foil, and freeze for up to 3 months. Thaw overnight in the refrigerator, then bring to room temperature before frosting. Frosted slices can also be frozen individually; wrap each Slice separately to prevent freezer burn.
Reheating Instructions
This cake is best enjoyed at room temperature, but if you’d like a warm slice, microwave an unfrosted piece for about 10 to 15 seconds. Avoid microwaving frosted slices for too long, as the glaze can melt unevenly.
Make Ahead Tips
You can bake the cake layers up to 2 days in advance. Wrap them tightly in plastic wrap once fully cooled and store at room temperature. The glaze can be made a day ahead and gently rewarmed on the stove or in the microwave in 10-second bursts until pourable again.
What to Serve With This Recipe
- A scoop of vanilla bean ice cream
- Fresh raspberries or strawberries for tartness
- A dusting of powdered sugar and a dollop of whipped cream
- A hot cup of coffee or espresso to echo the cake’s deep chocolate notes
- A glass of cold milk, for a simple classic pairing
Troubleshooting Section
My cake sank in the middle. This usually means the cake was underbaked or the oven door was opened too early during baking. Use a toothpick to test doneness before removing the cake, and try to resist checking on it before the 25-minute mark.
My cake turned out dry. This is almost always due to overbaking or too much flour. Measure flour by weight if possible, and pull the cake as soon as a toothpick comes out with a few moist crumbs attached.
My batter looks curdled. This typically happens when the eggs or buttermilk are too cold. It won’t ruin the cake, but for a smoother batter next time, let your wet ingredients come to room temperature first.
My cake stuck to the pan. Grease your pans generously and always line the bottoms with parchment paper, especially with a moist batter like this one.
My glaze is too thin or too thick. If it’s too thin, let it sit at room temperature for a few more minutes to firm up. If it’s too thick, warm it gently and stir in a teaspoon of warm cream at a time until it reaches a pourable consistency.
Expert Tips
As a pastry chef, the one thing I’d tell any home baker is to trust the process even when the batter looks unusually thin after adding the hot coffee. It’s supposed to look that way. That thin batter is exactly what bakes up into such a soft, tender crumb, and resisting the urge to add extra flour to thicken it is key to getting the texture right.
Nutritional Information
Values are approximate and will vary based on specific ingredients and brands used.
| Nutrient | Amount per Slice (1/12 of cake) |
| Calories | 340 kcal |
| Total Fat | 15g |
| Saturated Fat | 5g |
| Cholesterol | 35mg |
| Sodium | 320mg |
| Total Carbohydrates | 49g |
| Dietary Fiber | 2g |
| Sugars | 33g |
| Protein | 5g |
External Reference Suggestions
For more background on baking science and ingredient function, these are reliable, authoritative sources:
- King Arthur Baking Company’s baking guides (kingarthurbaking.com)
- Serious Eats’ food science articles by J. Kenji López-Alt (seriouseats.com)
- USDA FoodData Central for ingredient nutritional data (fdc.nal.usda.gov)
Recipe Summary
This soft chocolate cake recipe comes together in one bowl with pantry staples, and it delivers a moist, tender crumb every time thanks to the combination of oil, buttermilk, and hot coffee in the batter.
Whether you bake it as layers, cupcakes, or a sheet cake, it holds up well for days and freezes beautifully, making it a dependable go-to for birthdays, potlucks, or a simple weeknight treat.
If you try this soft chocolate cake recipe, I’d love to hear how it turned out. Leave a comment below with your results or any variations you tried, and don’t forget to save this recipe for the next time you need a chocolate cake you can count on.